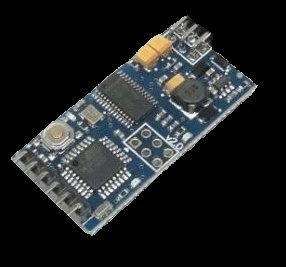
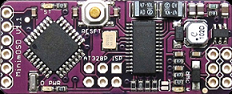
This all started when Fred (WB6ASU) dug up this cool set of boards from
EBAY. The board was an ARDUINO Pro Micro and a Sparkfun OSD BOB (break Out Board).
Fred begins to tell me this board will put an OSD message in our ATV Tx streams.
As you can guess, I got interested and said "Yeah I think this can work!!". The
next thing I know I have these two boards that are pretty small and do big things.
in actuallity there are three boards, there is a USB to Serial BOB used to talk to
the Arduino Pro Micro.
First order of business, can I talk to the boards? I promptly soldered header pins
onto the Arduino board so I can plug it into my hardware development system.
I also soldered pins onto the OSD BOB. I plugged the boards into the development
board and started wiring. After about 5 minutes, I was ready to begin. I had already
installed the Arduino IDE software onto my laptop.
I spent the next two days reading all I could find on the Arduino System, how it works and
why. I found this to be a very easy system to understand. The Arduino IDE does make
use of C+ programming code and structure. Having spent many years programming in C+ and C++
I found the transition to Arduino very easy. In the documentation I find there are built in
examples to test your hardware and allow for beginner training.
I loaded the "Blink" program into the little Arduino and the LED started blinking! I was
on my way!! I found an example code on the Sparkfun website. That code did not work.
I started to think that this was not as cool as I first believed. I kept looking online
for other people who have done this same thing with the same parts. I then found a Ham
in France, F5MNA he not only has used this, but on several projects! There I had found
not only harware examples but software examples as well.
I wired up the OSD BOB to the Arduino Pro Micro the same way the example shows, I then
downloaded the code and started to do the code mods. First knowing that all of Europe
uses the PAL standard for Video format, as compared to our NTSC Video format. First order
of business, modify code to generate video using the NTSC format.
1. NTSC mods were pretty straight forward
2. Translate the code remarks and footnotes into English
3. Change the code to reflect my Call Sign and location
After making these changes, I uploaded the code to my Arduino Pro Micro. I was pleased to see
my call sign being displayed on my TV Screen, I jumped on the local 2m repeater and called Fred
He was happy as a clam to find out it worked!!!.
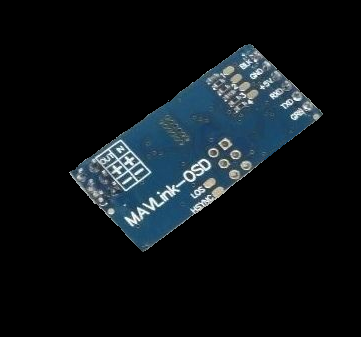
I then stopped off at Fred's and grabbed another board he found. This was very different altogether
this board was a combination of the Arduino Pro Micro and the Sparkfun OSD BOB (the OSD BOB uses the MAXIM 7456).
This board was called a MAVLink OSD, it is a board that is designed to use the ARDUCAM Software. This
software is designed to be used by the DRONE community and Helicopter community for doing FPV flying.
At this point I am very excited!! Time to try this small board .75 x 1.2 inches!.
I got home and downloaded my modified code into the new board and guess what!!! It did not work!
ok... research time. After looking at all the OPEN SOURCE code on the ARDUCAM OSD website, and some hardware investigation by Fred,
we found the board used different hardware pins from the ATMEGA 328 chip to the MAXIM 7456 OSD generator chip.
I then modified the code to match this configuaration and found I was eventually successfull. I had funky
Chinese characters where my callsign was supposed to be in English. I did more research and found it
was time to change the character firmware loaded into the MAVLink board.
So it was back to the F5MNA website, found the character set code he has been using, followed the instruction
(written in French) and after a few hours of trying to make this work, I was finally able to see my
call sign in English right exactly where I told the program to put it. I now have working hardware and
software to generate our call signs useing OSD. The video camera or video source plugs into the hamOSD system
and the output of hamOSD feed the TV transmitter.
|